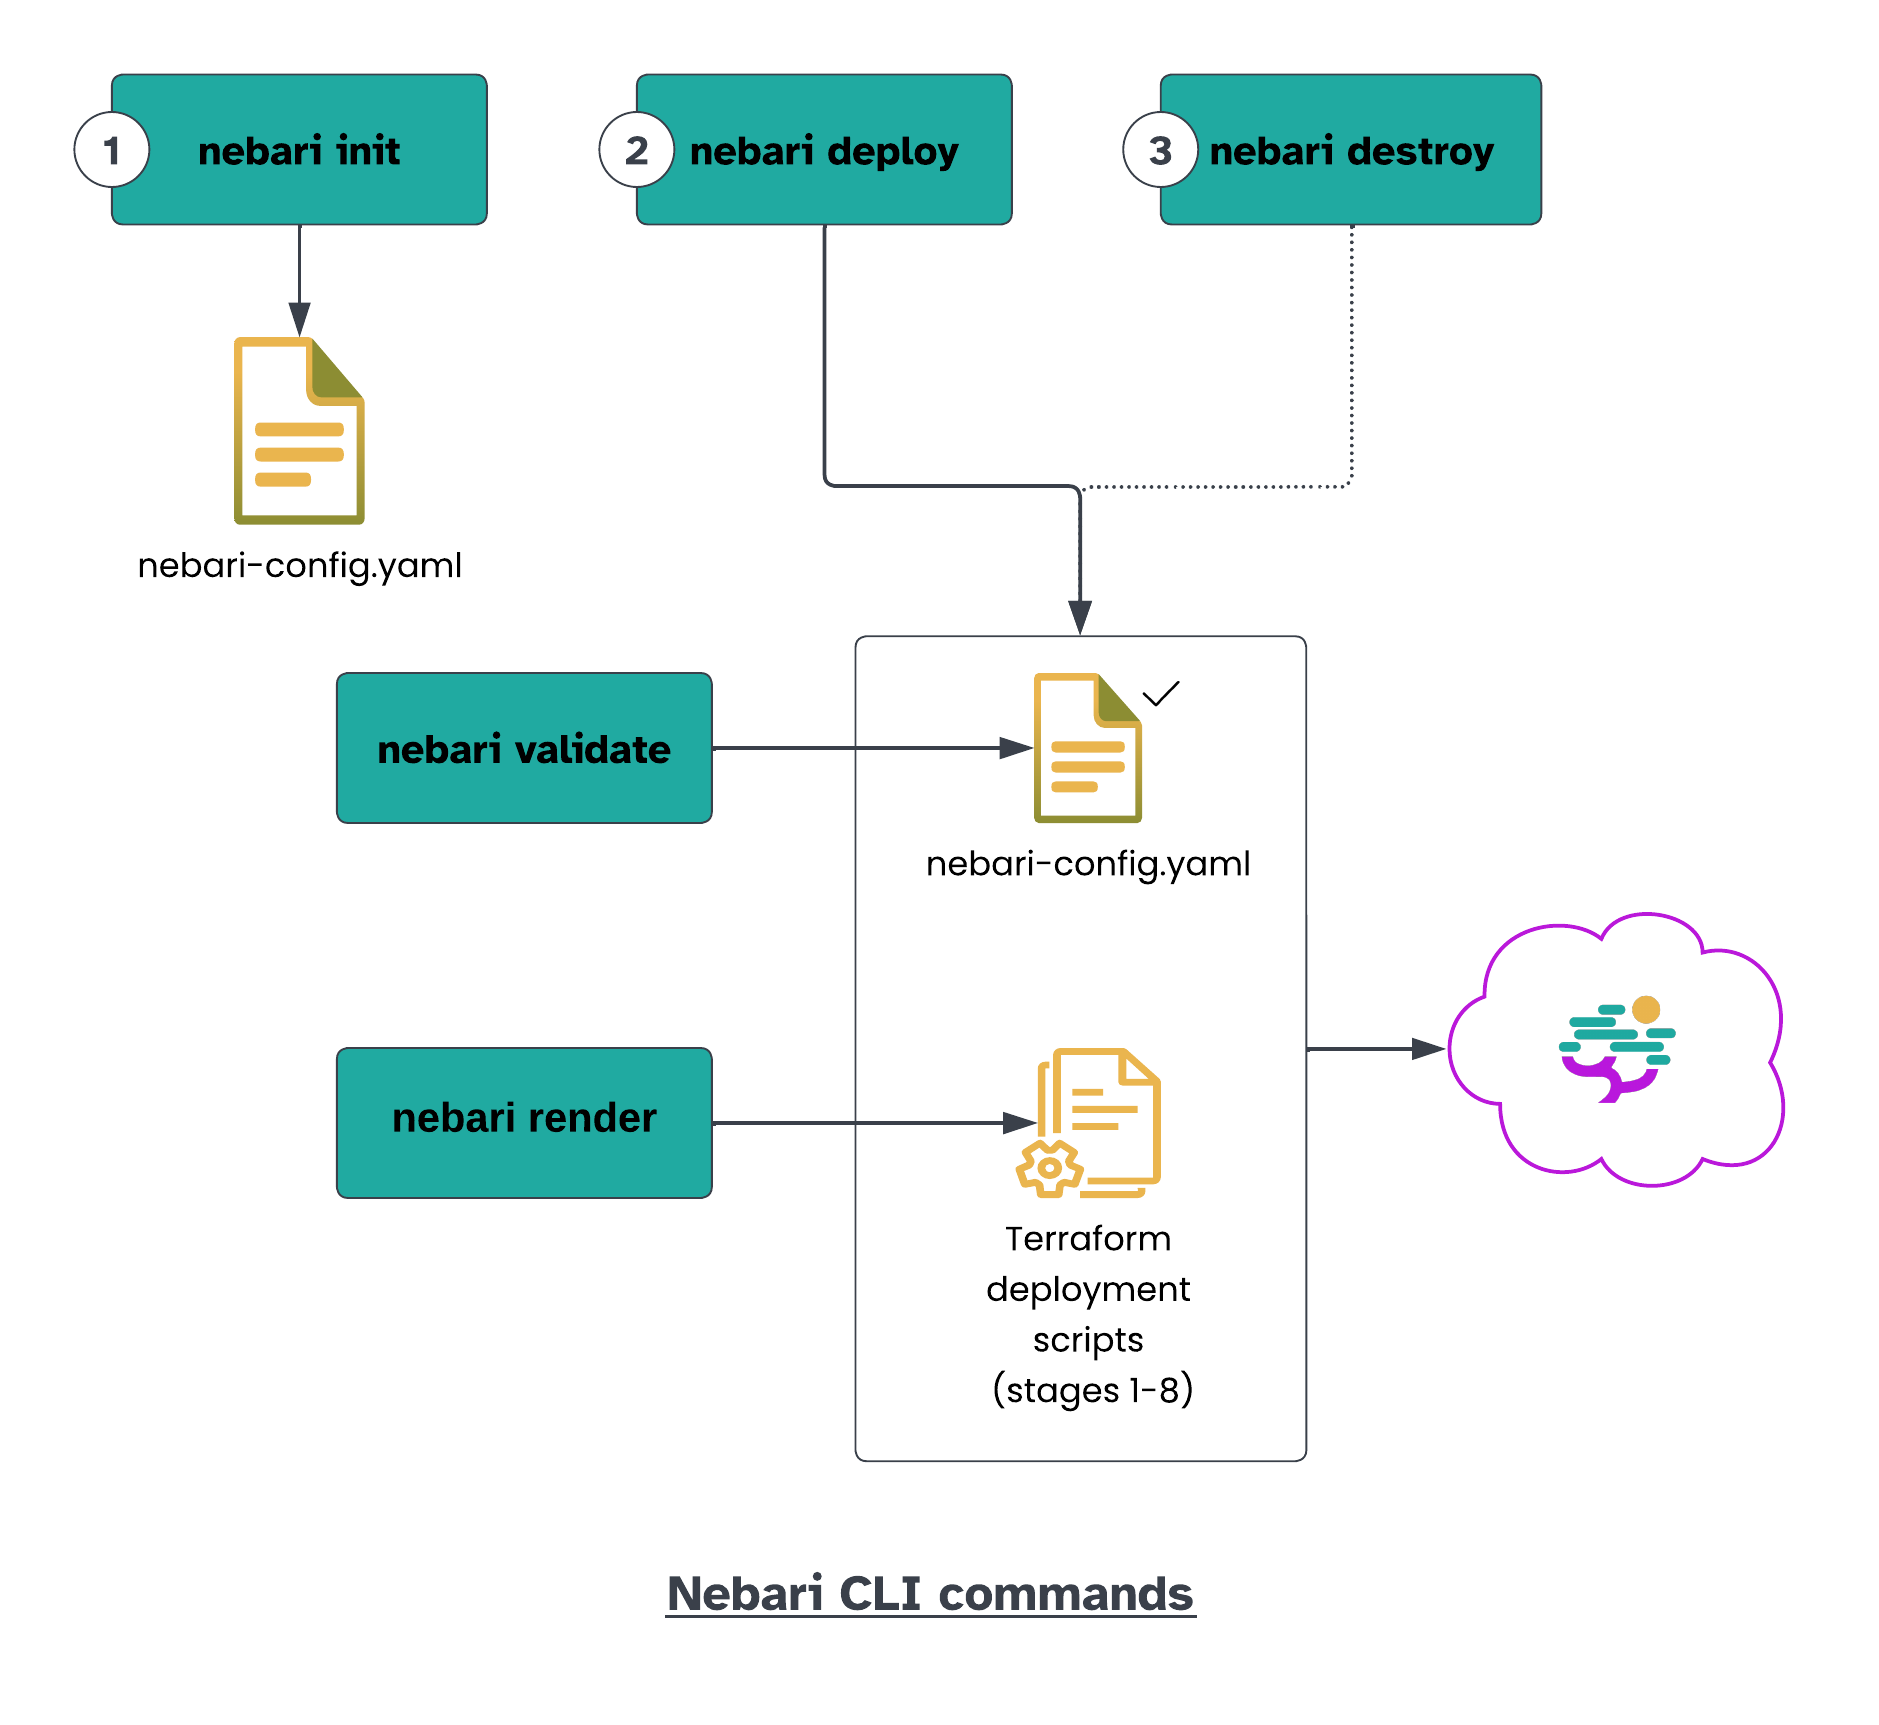
Quickstart
This is a quick Nebari CLI reference. If you're new to Nebari, start at Installing Nebari.
Install
You need a MacOS or Linux machine with Python >= 3.8 to install Nebari.
You can install Nebari from PyPI or conda-forge:
- conda
- pip
- mamba
conda install nebari -c conda-forge
python3 -m pip install nebari
mamba install nebari
Verify the installation with:
nebari --help
Make sure it displays an output similar to:
usage: nebari [-h] [-v]
            {deploy,render,init,validate,destroy,support,upgrade,keycloak,cost-estimate}
            ...

Nebari command line

positional arguments:
  {deploy,render,init,validate,destroy,support,upgrade,keycloak,cost-estimate}
                        Nebari - 0.4.3

optional arguments:
  -h, --help            show this help message and exit
  -v, --version         Nebari version number
Initialize
After installation, you can create a new Nebari project!
Create a new project directory:
mkdir <project-name>
cd <project-name>
Create the nebari-config.yaml file using the guided init wizard:
nebari init --guided-int
Or, if you know the initialization requirements and have set up the environment variables, you can directly run the nebari init command with the necessary flags.
- GCP
- AWS
- Digital Ocean
- Azure
Download the service account key file for your Nebari project, and set the following environment variables:
export GOOGLE_CREDENTIALS="path/to/JSON/file/with/credentials"
export PROJECT_ID="Project ID"
Create nebari-config.yaml with:
nebari init gcp --project projectname \
  --domain domain \
  --auth-provider password
Download the file with the Access Key ID and Secret Access Key provided by your IAM role, and set the following environment variables:
export AWS_ACCESS_KEY_ID="Access Key ID"
export AWS_SECRET_ACCESS_KEY="Secret Access Key"
Create nebari-config.yaml with:
nebari init aws --project projectname \
    --domain domain \
    --auth-provider password
Provide authentication credentials to Nebari by setting the following environment variables:
export DIGITALOCEAN_TOKEN=""          # API token required to generate resources
export SPACES_ACCESS_KEY_ID=""        # public access key for access spaces
export SPACES_SECRET_ACCESS_KEY=""    # the private key for access spaces
Create nebari-config.yaml with:
nebari init do --project projectname \
  --domain domain \
  --auth-provider password
Provide authentication credentials to Nebari by setting the following environment variables:
export ARM_CLIENT_ID=""        # application (client) ID
export ARM_CLIENT_SECRET=""    # client's secret
export ARM_SUBSCRIPTION_ID=""  # Available at the `Subscription` section under the `Overview` tab
export ARM_TENANT_ID=""        # Available under `Azure Active Directories`>`Properties`>`Tenant ID`
Create nebari-config.yaml with:
nebari init azure --project projectname \
  --domain domain \
  --auth-provider password
Deploy
- Regular deploy
- Automatic DNS provision
You can deploy your Nebari instance to the cloud (selected in the previous step) with:
nebari deploy -c nebari-config.yaml
You may need to set up necessary DNS records (with a DNS provider of your choice) for your chosen domain to proceed if you see:
Take IP Address 12.312.312.312 and update DNS to point to "your.domain" [Press Enter when Complete]
If you use Cloudflare, you can set up automatic DNS provisioning.
Create a Cloudflare API token and set the following environment variable:
export CLOUDFLARE_TOKEN="cloudflaretokenvalue"
Use the --dns-auto-provision flag with the Nebari deploy command:
nebari deploy -c nebari-config.yaml \
  --dns-provider cloudflare \
  --dns-auto-provision
It can take up to 30 mins for the deploy command to execute.
Destroy
To delete all your Nebari resources, while preserving the nebari-config.yaml file, run:
nebari destroy -c nebari-config.yaml
It can take up to 30 mins for the destroy command to complete.
tip
If you deployed Nebari on the cloud, verify if the relevant resources were destroyed and manually delete anything that was not destroyed.
Validate (optional)
After creating the nebari-config.yaml file, you can customize it. To ensure your customizations are valid, run:
nebari validate -c nebari-config.yaml
note
This command is automatically run when you deploy.
Render (optional)
You can generate the (Terraform) deployment workflow scripts with:
nebari render -c nebari-config.yaml
This is useful if you use a GitOps workflow with GitHub (or GitLab) Actions.
note
This command is automatically run when you deploy.
If you face any issues with the commands, check out the Troubleshooting guide.